PID Tuning
What is PID Tuning?
Good PID values ensure that the heaters temperatures are maintained accurately during printing, improving printing quality & consistency.
Nozzle PID tuning
Why Nozzle PID tuning Matters
-
Proper nozzle PID tuning ensures:
- Consistent extrusion: Stable temperatures mean consistent filament flow
- Better layer adhesion: No temperature variations between layers
- Reduced defects: Less stringing, oozing, and blobbing
- Faster prints: Heater reaches target faster and stays there
- Safety: Prevents thermal runaway from poor temperature control
-
By performing PID tuning for the nozzle heater, you help ensure that the nozzle temperature remains stable, preventing issues like temperature overshoot or undershoot during printing.
Prerequisites
- Printer homed and ready
- No prints currently running
- Good ventilation (hotend & bed will run at high temperature for extended periods)
Time required: ~10 minutes
What Temperature Should I Use?
Choose a temperature you typically print at eg.:
- PLA: 200-210°C
- PETG: 230-240°C
- ABS/ASA: 240-250°C
- TPU: 210-230°C
If you print different materials, tune at the temperature you use most often.
Methods to Perform PID Calibration for the nozzle
There are 2 ways to perform nozzle PID tuning. All methods perform the same tuning - they only differ in how you start it.
Using the Console in Mainsail
-
Open the Console in Mainsail
-
Enter the following command (replace
220with your target temperature):
PID_CALIBRATE HEATER=extruder TARGET=220
-
The nozzle will do some heating cycles while the temperature response will be measured. Wait for the tuning to complete (~10 minutes)
-
Once finished, save the results with :
SAVE_CONFIG
Using a Macro in Mainsail
You can also perform the PID Calibration by using the NOZZLE PID TUNE macro in Mainsail. This method is equivalent to using the Console command, but it simplifies the process by triggering the macro directly.
- In Mainsail, look for the NOZZLE PID TUNE macro button
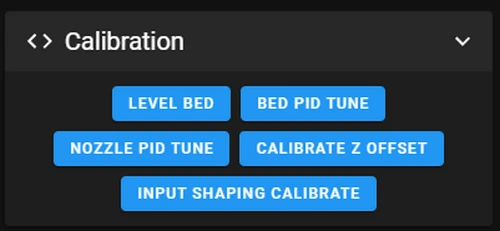
- Click it to start the tuning
Verification
After Calibration:
- Open Mainsail and navigate to Configuration → printer.cfg
- Scroll to the bottom of the file
- You should see a section like this:
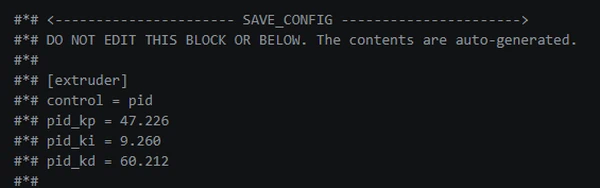
The exact values vary by every printer and even you will redo it on the same machine.
When to Re-Tune nozzle PID
You should re-tune nozzle PID if:
- You replace the hotend or heater cartridge
- You replace the thermistor
- You upgrade to a different hotend model
- You notice temperature instability (oscillations, overshooting)
- You move to a significantly different ambient temperature environment
Otherwise, PID Calibration remains valid indefinitely.
Bed heater PID Calibration
Why Bed PID Calibration Matters
-
Proper bed PID Calibration ensures:
- Consistent bed temperature: Stable temperatures mean better adhesion throughout the print
- Better first layer: No temperature variations that could cause warping or poor adhesion
- Reduced defects: Less warping and lifting of prints
- Faster heating: Bed reaches target faster and stays there
- Safety: Prevents thermal runaway from poor temperature control
-
By performing PID Calibration for the bed heater, you help ensure that the bed temperature remains stable, preventing issues like temperature overshoot or undershoot during printing.
Prerequisites
- Printer homed and ready
- No prints currently running
- Good ventilation (bed will run at high temperature for extended periods)
Time required: ~30-60 minutes (this depends hardly on your printer model and bed heater capabilities)
What Temperature Should I Use?
Choose a bed temperature you typically use, e.g.:
- PLA: 60°C
- PETG: 70-80°C
- ABS/ASA: 90-100°C
- TPU: 40-50°C
If you print different materials, tune at the temperature you use most often.
Methods to Perform PID Calibration for the Bed Heater
There are 2 ways to perform bed PID Calibration. All methods perform the same tuning - they only differ in how you start it.
Using the Console in Mainsail
-
Open the Console in Mainsail
-
Enter the following command (replace
80with your target temperature):
PID_CALIBRATE HEATER=heater_bed TARGET=80
-
The bed will do some heating cycles while the temperature response will be measured. Wait for the tuning to complete (~10 minutes)
-
Once finished, save the results:
SAVE_CONFIG
Using a Macro in Mainsail
You can also perform the PID Calibration by using the "BED PID TUNE" macro in Mainsail. This method is equivalent to using the Console command, but it simplifies the process by triggering the macro directly.
- In Mainsail, look for the BED PID TUNE macro button
Click it to start the tuning.
Verification
After Calibration:
- Open Mainsail and navigate to your
printer.cfg - Scroll to the bottom of the file
- You should see a section like this:
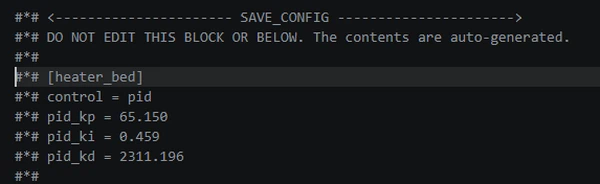
The exact values vary by every printer and even you will redo it on the same machine.
When to Re-Tune bed PID
You should re-tune bed PID if:
- You replace the heated bed or bed heater
- You replace the bed thermistor
- You notice temperature instability (oscillations, overshooting)
- You move to a significantly different ambient temperature environment
Otherwise, PID Calibration remains valid indefinitely.
Success
Congratulations! You've completed all the essential tuning steps! Your printer is now fully tuned and ready to produce high-quality prints!