Creating a Backup
Please dont skip this chapter!
You don't have to create a backup, but you should know what you may lose if you miss it ;)
Why backups are important
QIDI continuously improves their printers - which is great! However, they don't update version numbers (revisions) when hardware changes. This means your QIDI printer likely has unique hardware combinations that differ from other "identical" models.
FreeDi cannot provide a one-size-fits-all configuration because:
- Silent revisions: QIDI releases multiple batches with hardware changes but identical model names and version labels
- Widespread variations: Differences exist in mechanics, print beds, probes, toolheads, stepper drivers, mainboards, and more
- Inconsistent labeling: Even mainboards with the same label (e.g., "X-6 V1.0") can have different components and wiring
Warning
This is why creating a backup of your exact system configuration is critical before installing FreeDi. Without your backup, you may lack critical information needed to configure your specific hardware correctly.
Hardware variations across QIDI printers
Example
Below are two mainboards, both labeled "X-6 V1.0" - yet they have fundamentally different fan configurations:
User's Mainboard (hypdal) - labeled "X-6 V1.0"
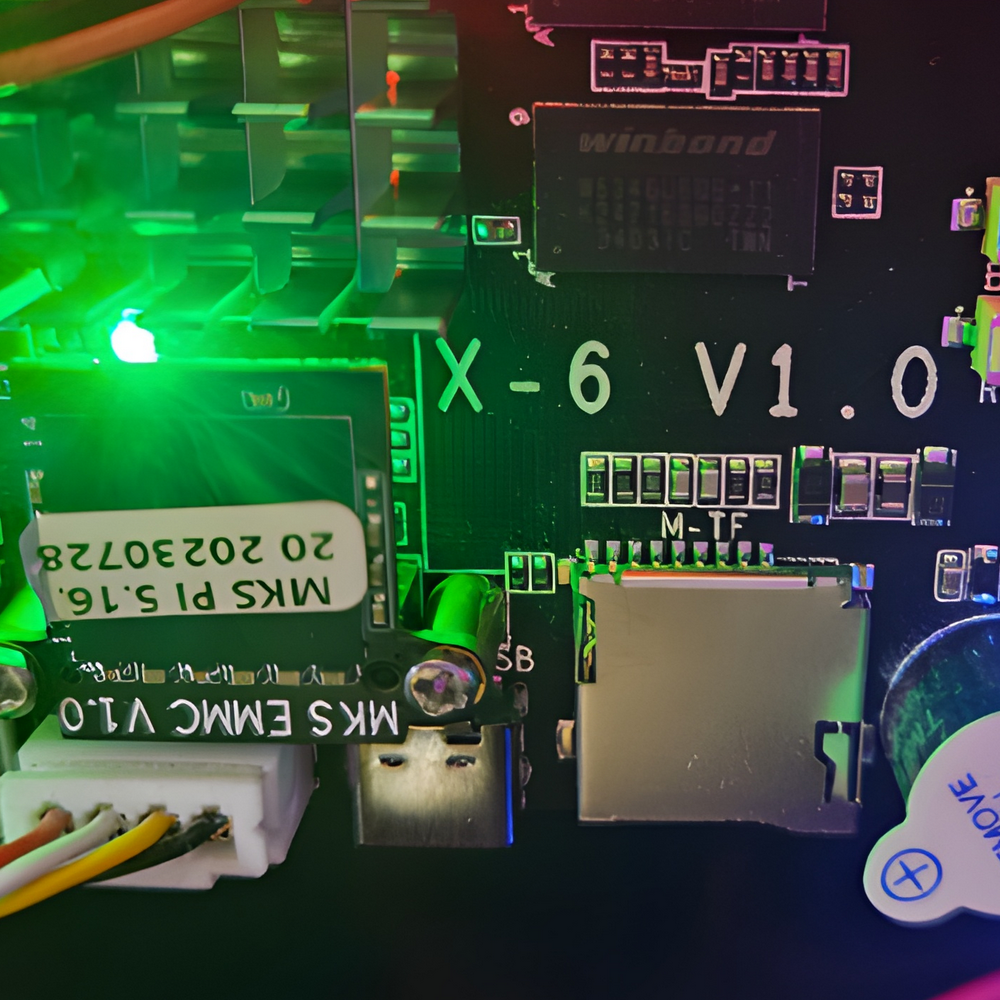
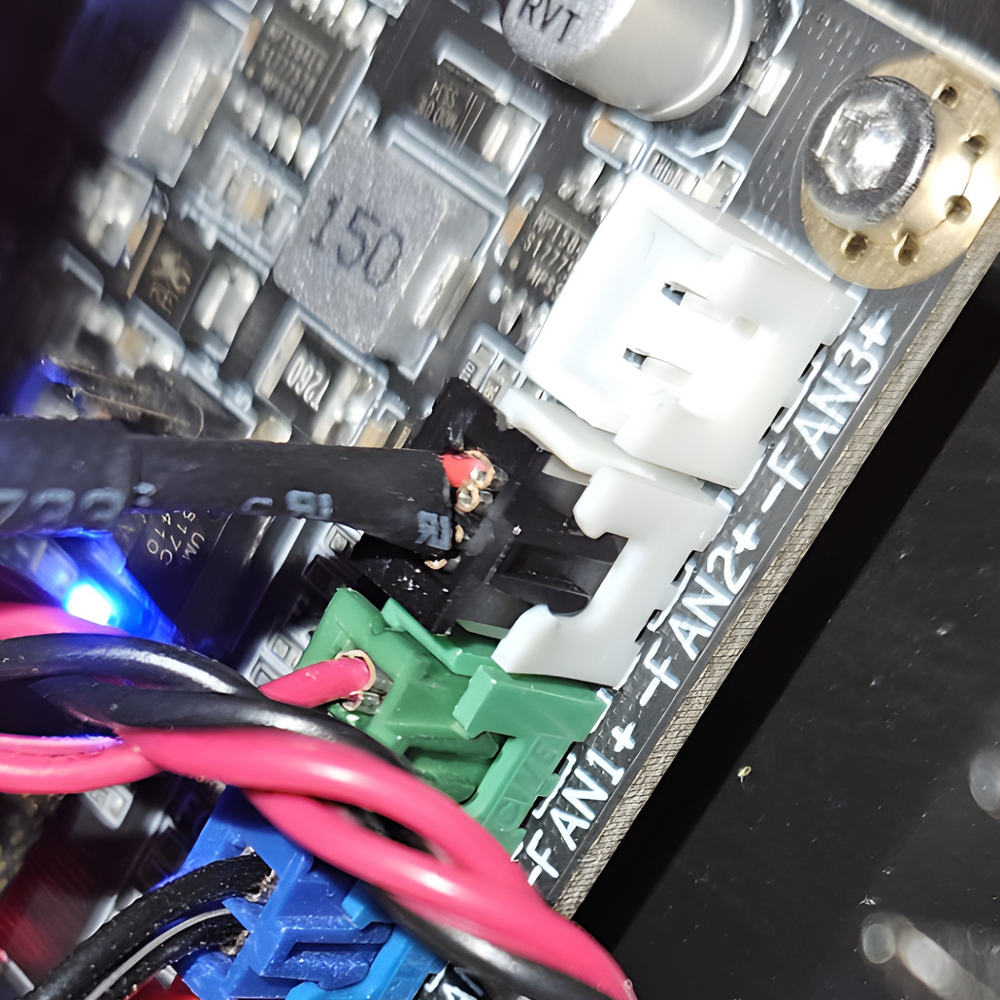
My Mainboard - labeled "X-6 V1.0"
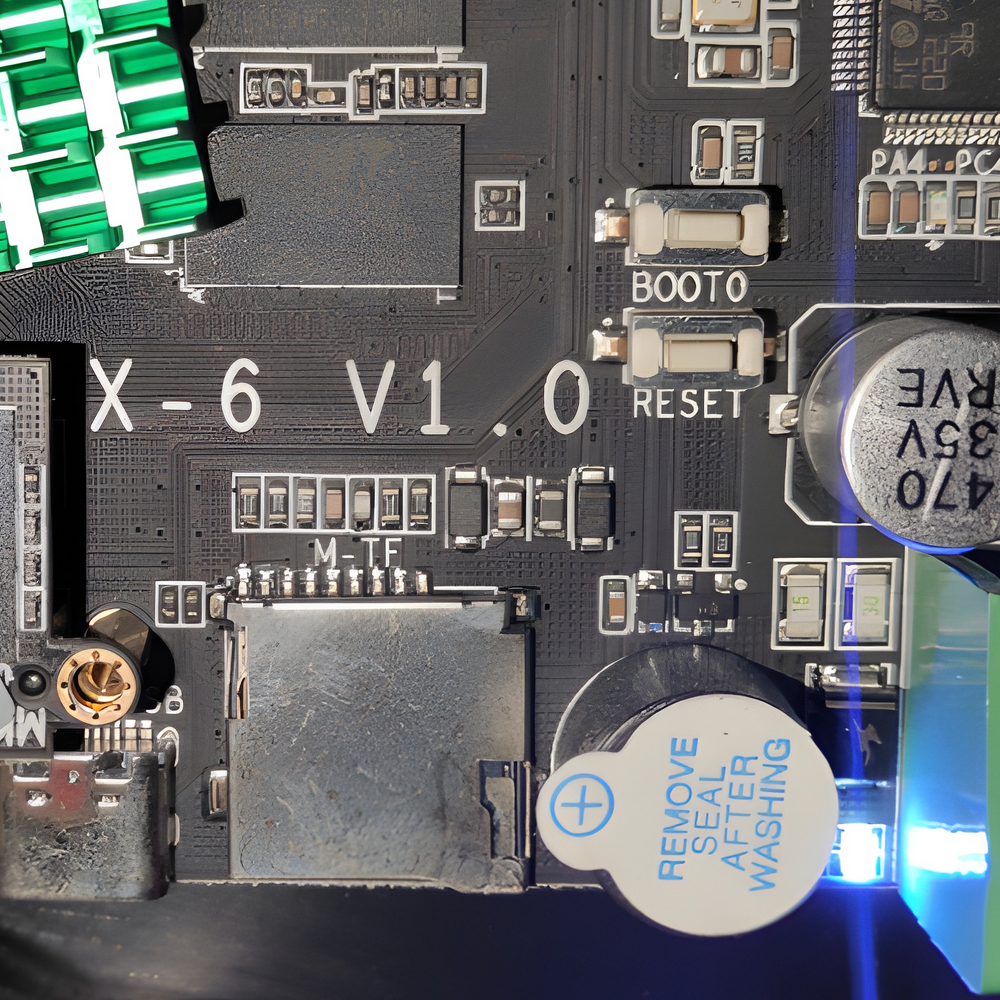
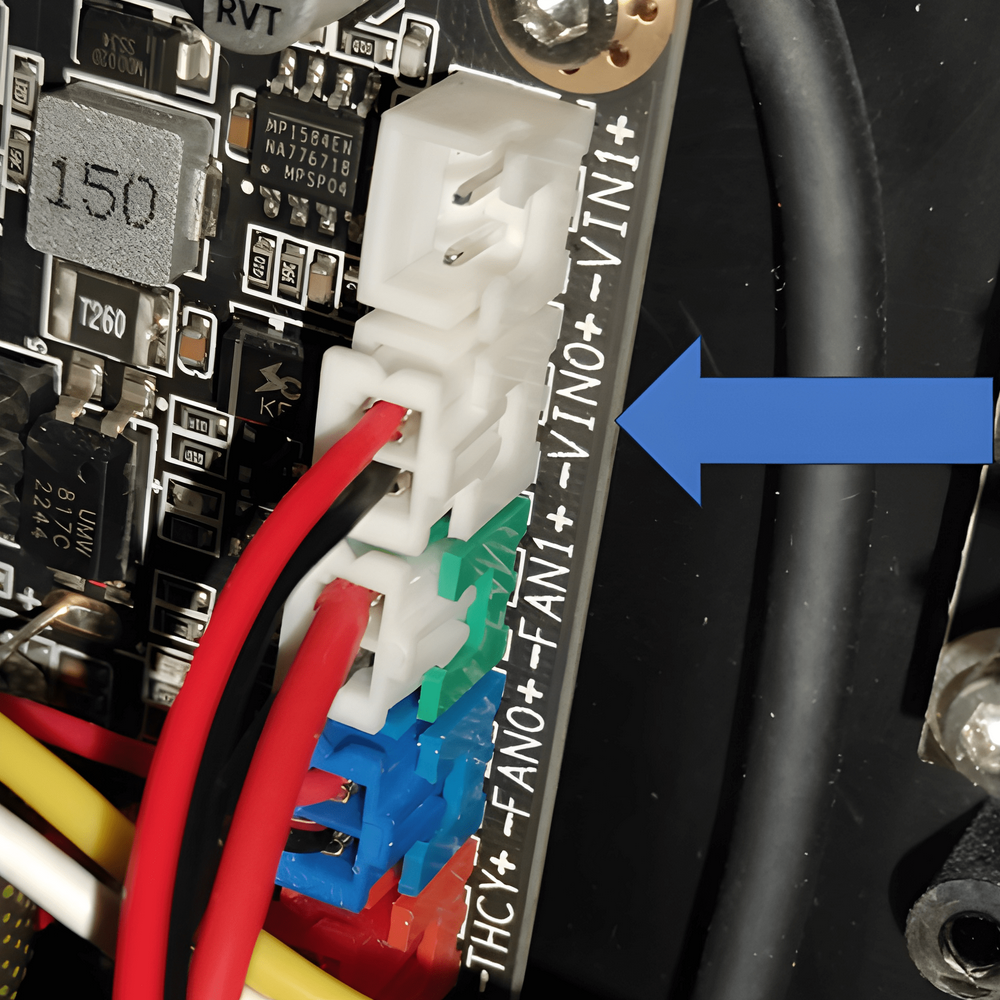
Key difference: One board has a controllable fan port, the other has an "always on" fan port.
Same label, but completely different behavior. More details in GitHub Issue #8.
Known hardware variations
- First batch: Different mechanics, print bed designs, and probe types
- Later batches: Updated toolheads and stepper drivers
- Mainboards: Multiple revisions labeled "X-4 V1.0" and "X-6 V1.0" with internal differences
- And likely more variations we haven't discovered yet or that QIDI will introduce in future production runs
Info
Your backup is your safety net. It ensures you can always reference your exact hardware configuration and revert if needed.
Backing up your printer configuration files
In most cases a basic backup is totally sufficient and fine. However a full image backup never hurts and will help if you want to revert back to the the stock system... ...for whatever insane reason you might have!
Method 1: Web Browser-based backup (beginner friendly)
Warning
Your browser or operating system may block the downloaded files, claiming .cfg files might be potentially dangerous. So please make sure to have them downloaded properly (these are obviously NOT dangerous for your PC!)
Note: you can't download them from the slicer's "Device" tab. use a regular web browser.
With Fluidd
Use your favorite browser to access your printer.
- For the stock printer use the port 10088: http://YOUR_PRINTER_IP:10088
- For non stock printers no port needed (default is 80): http://YOUR_PRINTER_IP
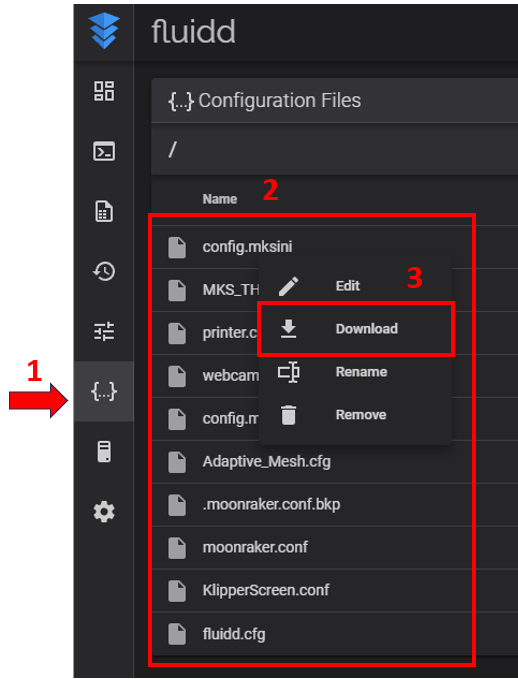
- Go to Config [1]
- Right-Click on each file in the list [2]
- Click download to save each file [3]
- Save them somewhere, where you can find it later.
With Mainsail
Use your favorite browser to access your printer.
- use your printer's IP to connect: http://YOUR_PRINTER_IP
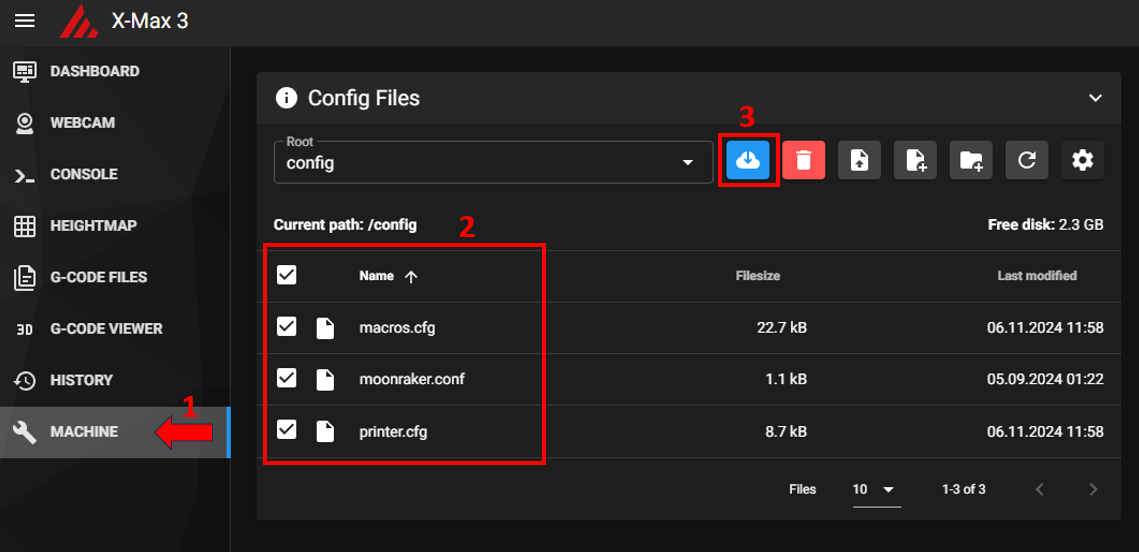
- Go to Machine [1]
- Check all the files in the "/config" path [2]
- Click download to save the zip compressed config [3]
- Save it somewhere, where you can find it later.
Method 2: SSH-based backup
Step 1 — Create a backup archive on the printer
This method is faster and less tedious than downloading files individually.
Don't forget to replace PRINTER_IP with your actual printer IP inside the command lines.
How to backup via SSH:
SSH into your printer with the default credentials user: mks password: makerbase (unless changed).
Then run:
cd
tar czf klipper-config-backup.tar.gz klipper_config
You should now have a file "klipper-config-backup.tar.gz" inside /home/mks/
Verify the backup by running:
ls -lh klipper-config-backup.tar.gz
Step 2 — Download it to your computer
Linux & macOS users:
Run:
scp mks@PRINTER_IP:/home/mks/klipper-config-backup.tar.gz ~/Downloads
Windows users:
On Windows, you can either download the file with an SFTP client like WinSCP or Mobaxterm.
or use command lines while NOT connected via SSH to the printer:
Via CMD, run:
scp mks@PRINTER_IP:/home/mks/klipper-config-backup.tar.gz %USERPROFILE%\\Downloads\\
Via PowerShell, run:
scp mks@PRINTER_IP:/home/mks/klipper-config-backup.tar.gz $env:USERPROFILE\\Downloads\\
If SCP hangs or stalls (legacy mode):
scp -O mks@PRINTER_IP:/home/mks/klipper-config-backup.tar.gz %USERPROFILE%\\Downloads\\
scp -O mks@PRINTER_IP:/home/mks/klipper-config-backup.tar.gz $env:USERPROFILE\\Downloads\\
Note for Windows users
Windows 10 (1809+) and Windows 11 include OpenSSH by default.
If SCP is missing, install it via: Settings → Apps → Optional Features → Add "OpenSSH Client"
Optional: One-liner that streams directly to your PC
No file is created on the printer — data streams directly to your PC.
Linux & macOS users:
Run:
ssh mks@PRINTER_IP "tar czf - -C ~ klipper_config" > ~/Downloads/klipper-config-backup.tar.gz
Windows users:
Use these command lines while NOT connected via SSH to the printer:
via CMD:
ssh mks@PRINTER_IP "tar czf - -C ~ klipper_config" > %USERPROFILE%\\Downloads\\klipper-config-backup.tar.gz
ssh mks@PRINTER_IP "tar czf - -C ~ klipper_config" | Set-Content -Path "$env:USERPROFILE\\Downloads\\klipper-config-backup.tar.gz" -Encoding Byte
Commands for Tailscale users
for Tailscale users:
on Linux:
scp mks@100.x.y.z:/home/mks/klipper-config-backup.tar.gz ~/Downloads
On WIndows:
via CMD:
scp mks@100.x.y.z:/home/mks/klipper-config-backup.tar.gz %USERPROFILE%\\Downloads\\
scp mks@100.x.y.z:/home/mks/klipper-config-backup.tar.gz $env:USERPROFILE\\Downloads\\
Step 3 — backup restoration
Linux & macOS users:
Run:
scp ~/Downloads/klipper-config-backup.tar.gz mks@PRINTER_IP:/home/mks/
ssh mks@PRINTER_IP "tar xzf klipper-config-backup.tar.gz"
Windows users:
Use these command lines while NOT connected via SSH to the printer:
via CMD:
scp %USERPROFILE%\Downloads\klipper-config-backup.tar.gz mks@PRINTER_IP:/home/mks/
ssh mks@PRINTER_IP "tar xzf klipper-config-backup.tar.gz"
scp $env:USERPROFILE\Downloads\klipper-config-backup.tar.gz mks@PRINTER_IP:/home/mks/
ssh mks@PRINTER_IP "tar xzf klipper-config-backup.tar.gz"
Method 3: Full Image Backup (Maximum Protection)
Advantages:
A full image backup captures your entire system - perfect if you want the ability to revert completely to stock firmware.
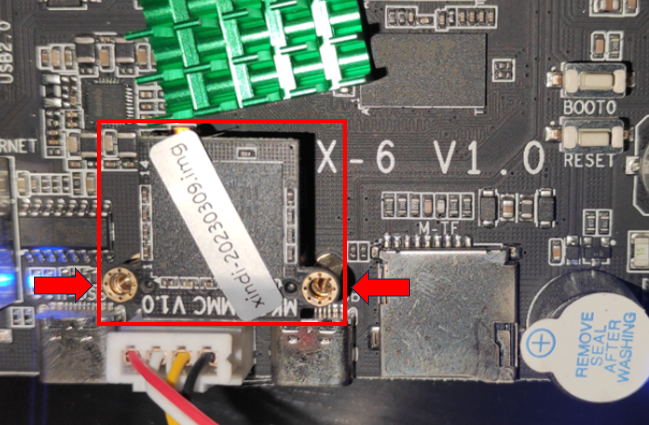
- Shutdown the printer and turn off the power.
-
Open the cover on the backside to get access to the mainboard. Pay attention to the fan cable!
-
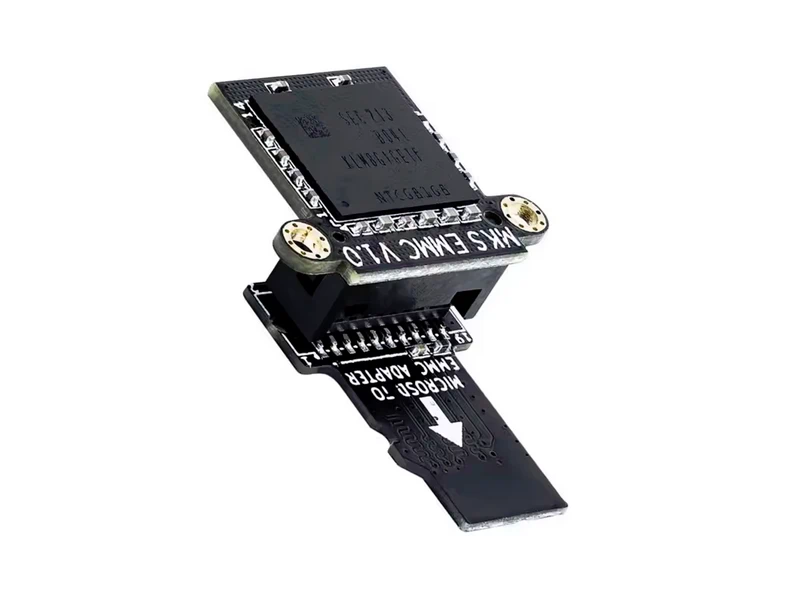
Remove the two screws and detach the EMMC card:
- Use an EMMC card reader to connect it to your PC.
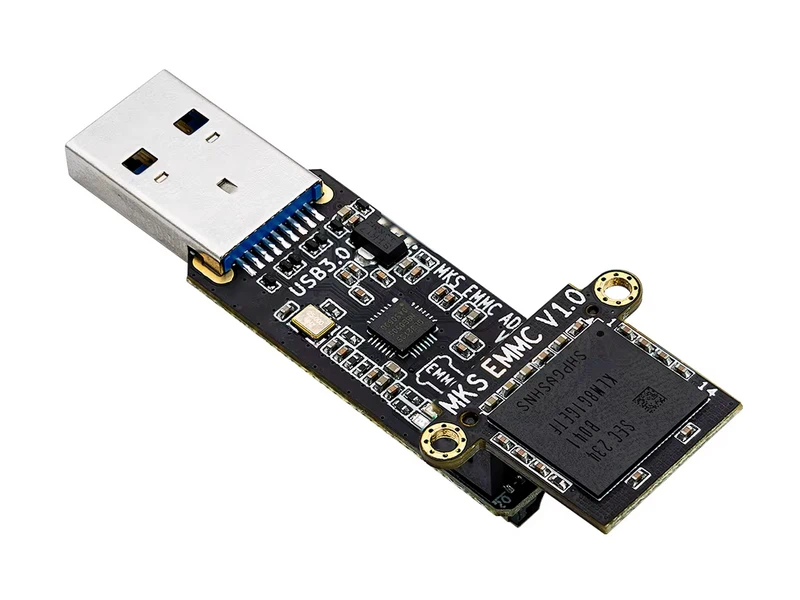
- Open an imager software like Win32DiskImager and backup the entire EMMC by creating an .img file:
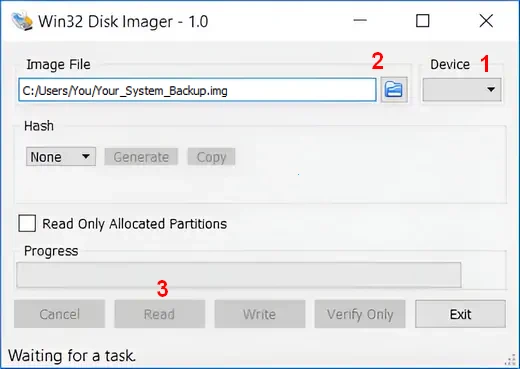
- choose the right USB device
- click on the blue folder, choose the destination folder & filename for your backup (don't forget to add .img)
- click on Read and wait for the copy to finish
Tip
If you did a full system backup, don't put the emmc back on the printer's board yet. You will need it to install the operating system.
Thanks to Angelo-Hub for his contribution to the backup methods.
Thanks to Hypdal for his mainboard pictures.