Z-Offset Coarse Tuning
What is the famous "Z-Offset" ?
The Z-offset tells your printer the exact distance between the nozzle tip and the bed surface when it thinks it's at Z=0. Getting this right ensures that your first layer sticks properly without being too squished or too far away.
ADVICE: It is highly recommended to follow BOTH STEPS: coarse + fine tuning!
STEP 1 : Z-OFFSET "coarse" calibration
Info
- This is the coarse Z-offset calibration (getting "close enough"). After this, you'll use test prints to fine-tune it perfectly.
- Make sure you've completed the previous Manual Bed Leveling first!
- Time required: 1 minute.
The Paper Test Technique
The "paper test" is the standard method for coarse Z-offset calibration: sliding the paper between nozzle and bed.
Feel for resistance: Move the paper. The paper should drag slightly but still move.
Too tight: If you can't move the paper at all, the nozzle is too close
Too loose: If the paper slides freely with no resistance, the nozzle is too far
Why doing it differently than QIDI?
This method has been created by C0co, and it's different from QIDI's official method.
What is different and why?
- No preheat to save time (about 15-25min depending on your printer model)
- Calibration is done in the front area of the bed for easier access
Note
Calibrating the z-offset perfectly with a paper needs a lot of experience.
That's why here, you do it coarse first, and then make it perfect with the next step by printing a single layer file.
Prerequisites
- Bed leveling completed
- Printer homed and ready
- Paper or feeler gauge (0.1mm recommended, but standard printer paper works)
- Clean nozzle and bed surface
Methods to Calibrate Z-Offset
There are three ways to start the Z-offset calibration. Choose the one that works best for you.
Method 1: Using the Display Menu (Recommended)
This is the easiest method for most users.
On the printer display, go to:Gear Icon → Advanced → Next Page → Z-Offset
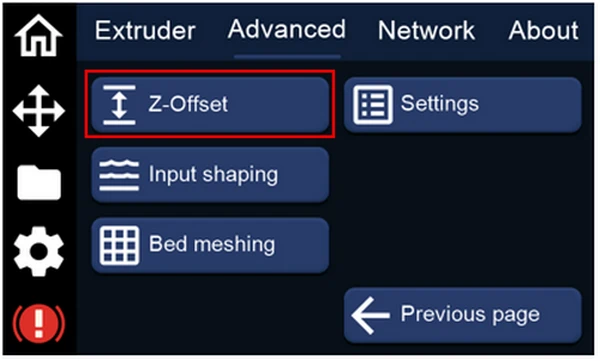
The printer will automatically start the PROBE_CALIBRATE macro and show this screen:
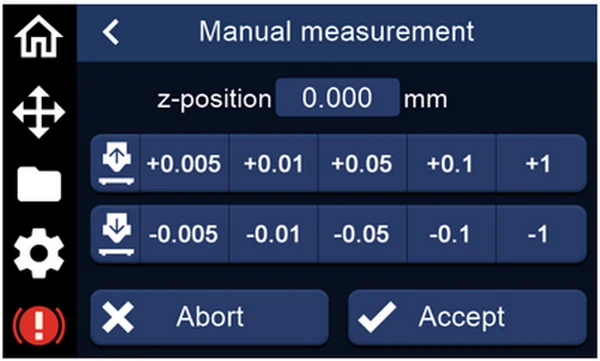
Adjust the nozzle height:
- Place the paper or card (provided by QIDI) between the nozzle and bed
- Use the + and - buttons to raise or lower the nozzle
- Slide the paper back and forth until you feel slight resistance (paper drags but doesn't tear)
Once you've reached the correct position, confirm on the screen by pressing ACCEPT.
Method 2: Using the Console in Mainsail
This method gives you more control and is useful if you're familiar with G-code commands.
Enter the following commands in Mainsail's Console:
G28
G1 X100 Y100
PROBE_CALIBRATE
Follow the same paper test procedure as Method 1.
Once satisfied, enter this in the Console:
ACCEPT
SAVE_CONFIG
Method 3: Using a Macro in Mainsail
You can also use the "CALIBRATE Z OFFSET" macro in your Mainsail page.
In Mainsail, look for the macro button:
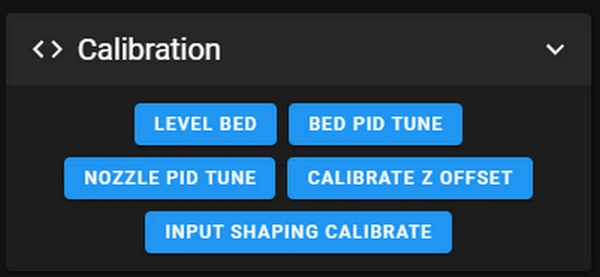
Click it to start the calibration and follow the same paper test procedure as Method 1.
Mainsail's z-offset adjustement window will appear on screen:
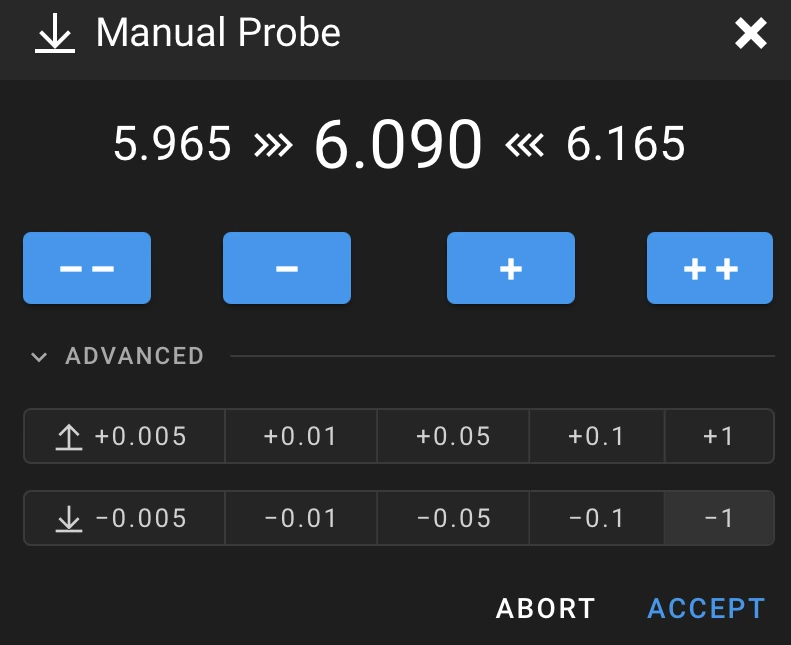
Adjust your z-offset with the buttons, clic ACCEPT to keep the value, then hit the SAVE CONFIGURATION button at the top of your Mainsail interface.
Verification after setting the Z-offset:
The value should appear at the bottom of your printer.cfg file, in the green lines zone.
You should now be ready for fine-tuning with test prints.
Typical Z-offset values: Between -0.5mm and -3.0mm (varies by printer model and setup)
Quick note:
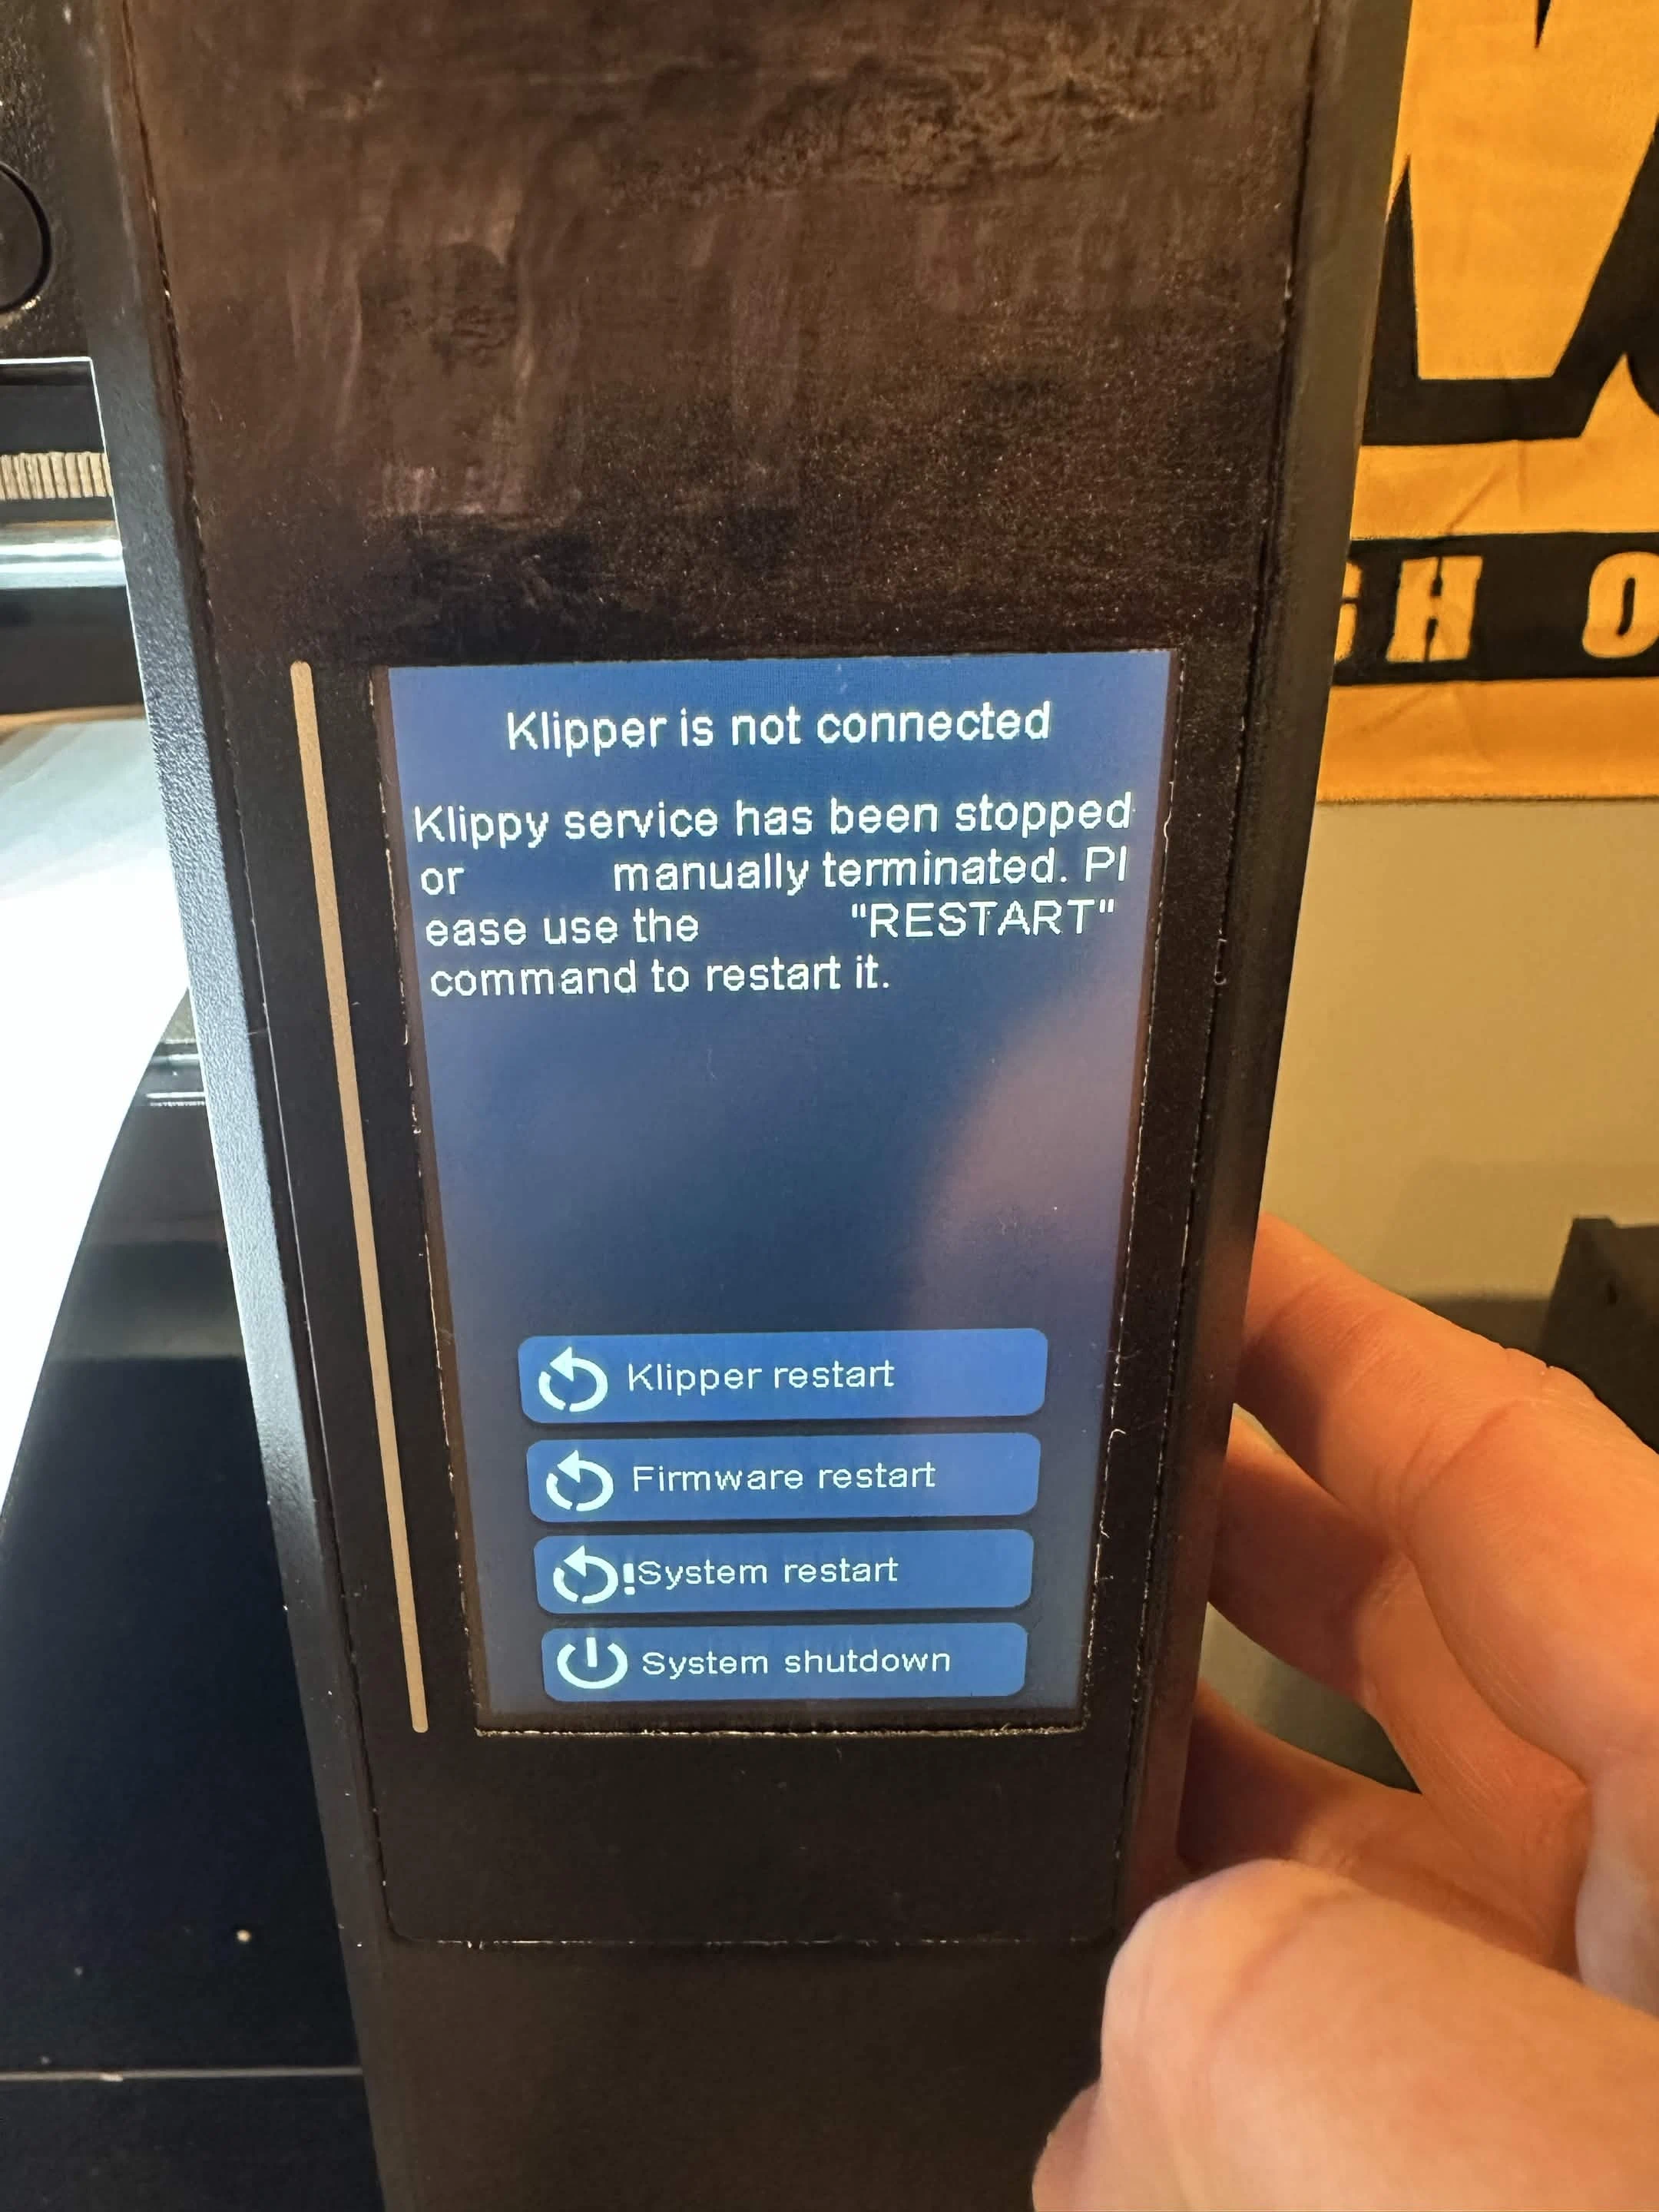
Klipper restarts automatically when using the SAVE_CONFIG command.
When saving the new offset, don't worry if you see that Klipper gets disconnected for a few seconds:
Why Not Using Auto Z-Calibrate?
The Q1 Pro and Plus4 come with 4 piezo sensors under the print bed. In theory, this would make automatic Z-offset measurement possible. In reality, this does not work reliably for all users.
I tested the qidi_auto_z_offset adaptation by frap129 to make it available for open Klipper systems. It did not work on my Plus4, and it also didn't work when my Plus4 was a new unmodified (stock) system. See this issue.
If you want to experiment with it, check the [auto_z_offset] section in the printer.cfg. It does work for some users, but I cannot include something I can't test myself and only works for a fraction of users.
Next Steps
This coarse calibration gets you "close enough" to print, but it's not perfect. The next step is to fine-tune your Z-offset using actual test prints, which gives much better results than the paper test alone.
After completing the coarse Z-offset calibration, it's time to fine-tune it for perfect first layer adhesion. This method is much more accurate than the paper test because you can see and adjust the actual print quality in real-time.
Warning
- Make sure you have completed this step correctly before the next step
- Fine-Tuning aims at perfecting your Z-offset using live adjustment aka babystepping while printing a test pattern.