Z-Offset Fine Tuning
What is Fine-Tuning?
Info
- The paper test gets you "close enough," but it's not perfect.
- Fine-tuning uses an actual print to dial in the exact Z-offset by observing how the filament lays down and making live adjustments until it looks perfect.
- Time required: ~5-15 minutes (one test print)
Prerequisites
- Bed leveling completed
- Coarse Z-offset calibration above completed
- Printer ready with filament loaded
- Clean bed surface
Step 1: Locate the Pre-Sliced Test File
FreeDi includes pre-sliced Z-offset calibration files for each printer model. These files print a single-layer test pattern that's perfect for fine-tuning.
Finding the Test File
After installation (if you used the Wizard), the calibration files are automatically placed in /home/mks/printer_data/gcodes/ .
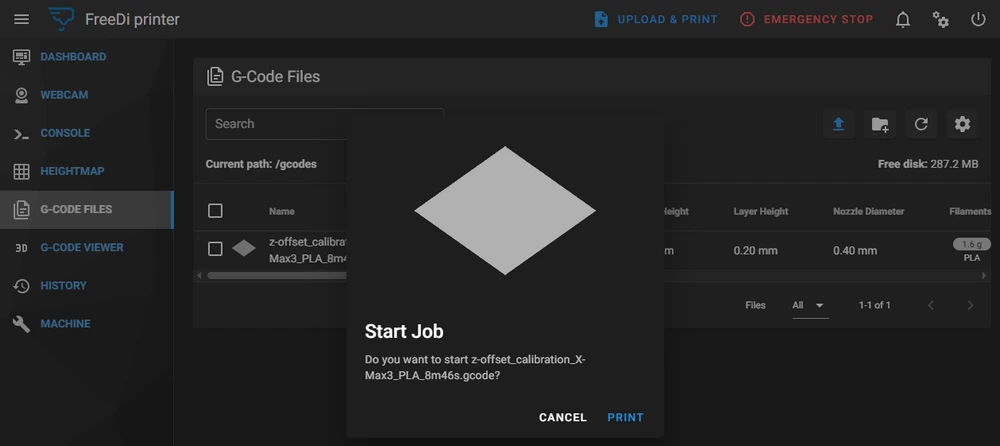
Option A: Via Mainsail
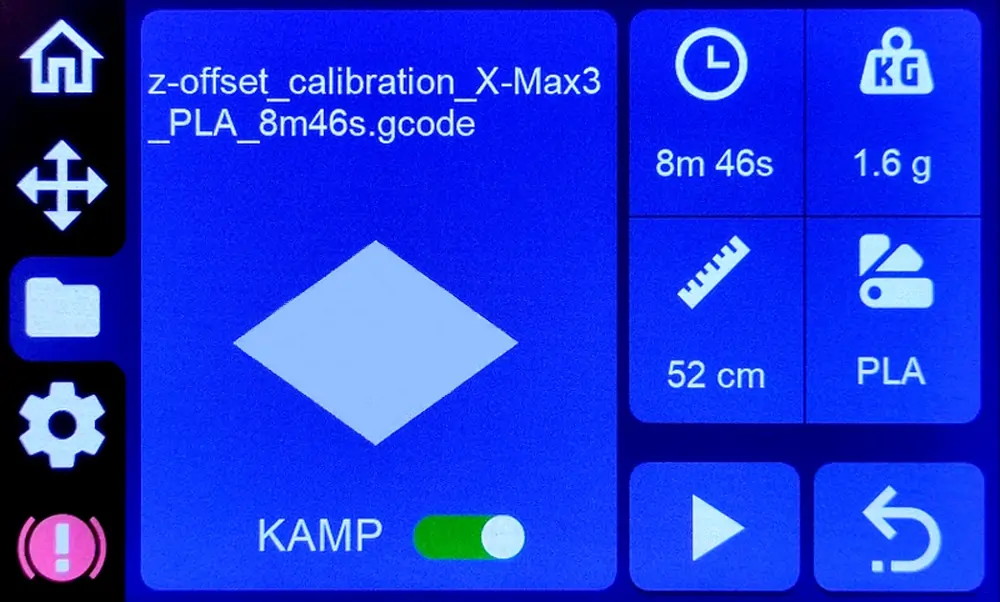
Option B: Via Display File Manager
If you don't have the files: Download them from the FreeDi repository folder and upload them to your printer via Mainsail.
Step 2: Start the Test Print
- Select the calibration file for your printer model
- Start the print
- Watch closely as the first layer begins printing
Note: The test print is designed to give you enough time to make adjustments before it finishes. Stay near the printer and keep your eyes on the first layer!
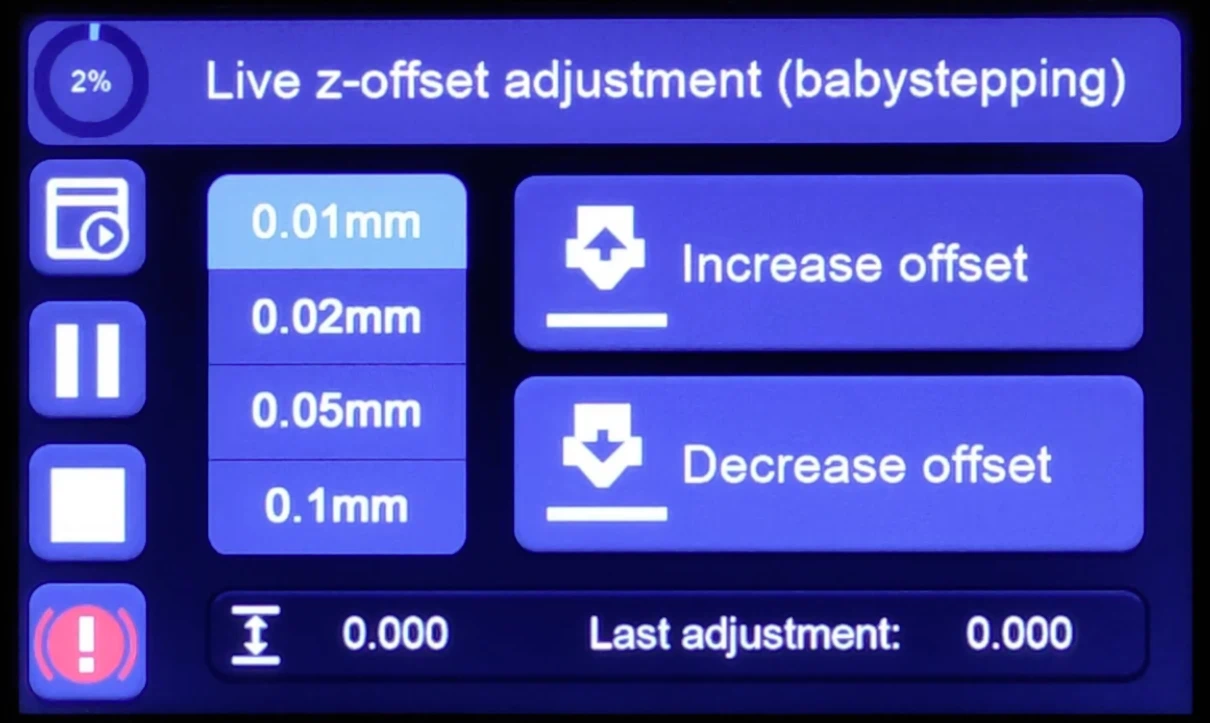
Step 3: Observe and Adjust with Babystepping
While the print is running, observe the first layer quality and make live adjustments using babystepping.
On the screen, you can access babystepping by pressing the icon above the PAUSE button when a print job is launched:
Step 4: What to Look For
Here are some visual representations to help you 1:
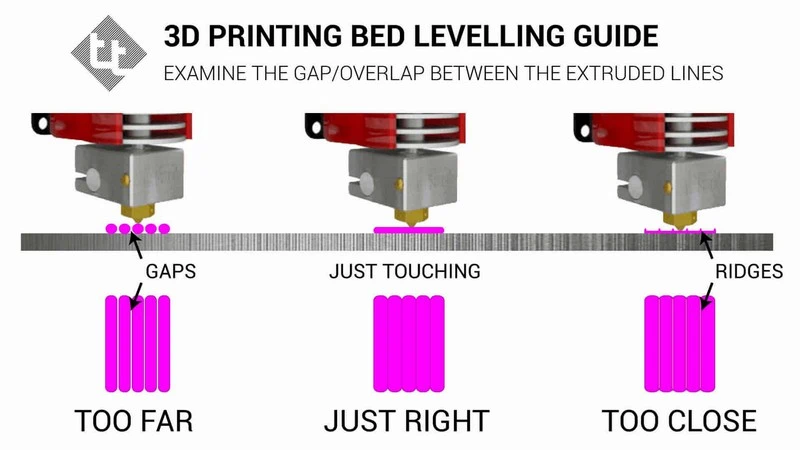
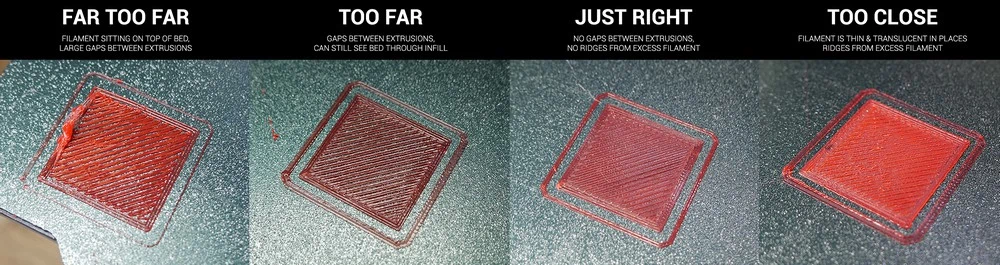
Nozzle is too Close:
- Visual signs:
- Filament is squished flat with no texture
- Material pushed to the sides creating ridges
- Lines merge together completely (no gaps visible)
- "Elephant's foot" effect (bottom layer wider than it should be)
- Translucent or very thin appearance
- Solution: increase Z-offset
Nozzle is too Far:
- Visual signs:
- Lines don't stick to the bed
- Visible gaps between lines
- Lines are round instead of flat
- Poor adhesion (lines lift or curl)
- Rough, textured surface
- Solution: Decrease Z-offset
Perfect Z-Offset
- Visual signs:
- Smooth, even surface with slight texture
- Lines touch but are still individually visible when looking closely
- No gaps between lines
- Good adhesion to the bed
- Slight glossy appearance (not matte, not mirror-shiny)
- Consistent thickness across the entire print
- This is your target! Once you see this, stop adjusting!
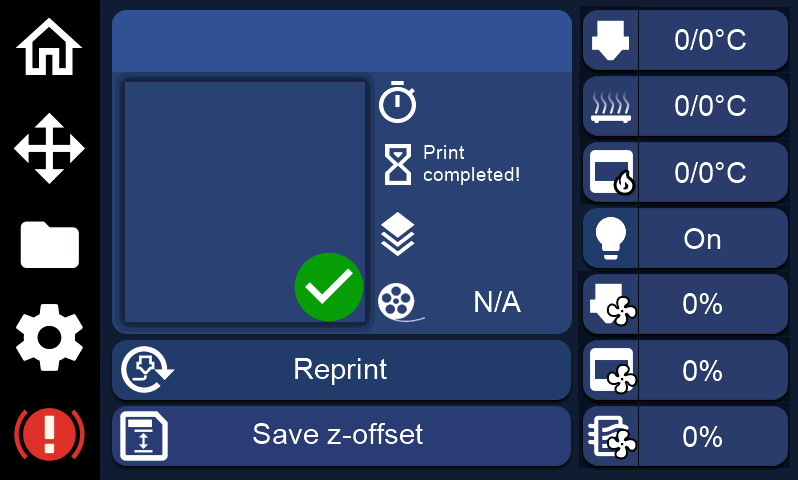
Step 5: Save Your Z-Offset
After the print completes, you'll be taken to the "Print Completed" screen.
Important!
If you made any Z-offset adjustments during the print, a Save Z-Offset button will appear at the bottom of the screen when the print ends.
Tap the button to save your new Z-offset permanently. This triggers a SAVE_CONFIG command and stores your settings inside your printer.cfg.
Don't skip this step! If you don't save, your adjustments will be lost!
Tips for Success
- Make small adjustments: Babystepping works in small increments (usually 0.01-0.025mm). Don't over-adjust.
- Watch the first few lines: You'll see the results of your adjustments within seconds.
- Be patient: It's better to make gradual adjustments than to overshoot.
- Good lighting helps: Position yourself where you can clearly see the first layer texture.
- One test is usually enough: The calibration file is large enough to dial it in during a single print.
Verification
After saving your Z-offset:
- Print a small test object (e.g., a calibration cube or benchy)
- Check the first layer quality
- If it looks perfect, you're done! If not, repeat the fine-tuning process
Your Z-offset should now be perfectly dialed in for reliable, high-quality prints.
Alternative: Create Your Own Test File
If you prefer, you can create your own single-layer test print:
- Open your slicer (OrcaSlicer, PrusaSlicer, etc.)
- Import a large, flat model (e.g., a square or circle)
- Set layer height to your typical printing layer height (e.g., 0.2mm)
- Set the print to only 1 layer (adjust Z-height in slicer settings)
- Slice and export the G-code
- Upload to your printer and use it for fine-tuning
Troubleshooting
I adjusted too much and now it's worse
Solution: Home the printer and start a new test print. The adjustments aren't saved until you press "Save Z-Offset."
The "Save Z-Offset" button doesn't appear
Solution: You may not have made any adjustments during the print, or the printer didn't detect changes.
You can manually save by running SAVE_CONFIG from the Console in Mainsail.
Different areas of the bed look different
Solution: This indicates your bed might not be perfect level.
Return to bed leveling and re-level the bed,
then redo Z-offset calibration.
Important Reminder
After fine-tuning your Z-offset, do NOT re-level the bed unless absolutely necessary!
Re-leveling the bed changes its physical position, which invalidates your carefully calibrated Z-offset.
If you must re-level (e.g., after moving the printer, hardware changes hitting the print bed), you may need to redo both coarse and fine Z-offset calibration.
-
images by Teaching Tech under CC-BY-SA-4.0 license ↩